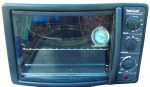
| Toaster-Oven Rcandy |
|
| Advantages: The oven is relatively inexpensive. $40 to $50. It is easily relocated to a fire-safe spot Cooking is quicker, often much quicker Small batch is easily consolidated by hand |
Disadvantages: Uneven cooking requires more diligence Poor diligence may result in dark, slow-burning propellant Inaccurate temperature dial Small batch size |
In addition to the equipment mentioned in the primary
rcandy page,
you will need:
|
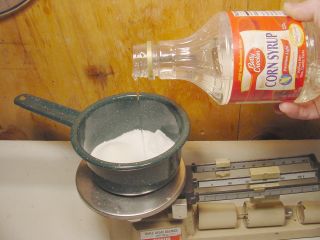
Why a "Pie
Pan?" Because it fits the oven. Also, it is what I
have used to develop this recipe, so is known to work. But an 8-inch
square pan will also fit in this oven, and will have a larger surface area.
I will test that soon. Why a glass pan? Because glass doesn't warp. These pans must be flat, and metal pans often warp or get bent. Also because glass retains a lot of heat for the initial cooking that occurs when you dump the propellant liquid into the pan. |
|
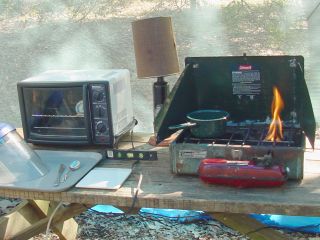
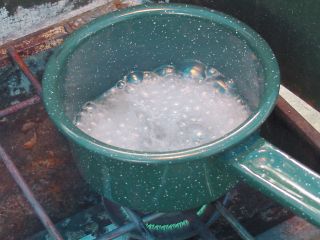
The pie pan is heating in the oven, and the Coleman stove is getting fired up... literally! Don't worry... the propellant mix is non-flammable at this point, and the leaping flame will settle into a nice blue ring before I put the kettle on. The toaster-oven is already turned on and heating the baking pan that is inside it. I will level it up before putting the propellant liquid in. Preheating the oven and the baking pan speeds the baking and reduces the failure rate. |
 Out to the picnic table!
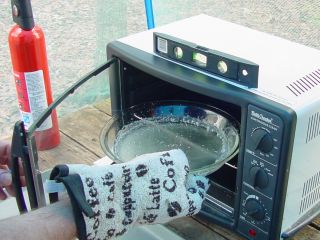 Note the "leveling device" on the oven.
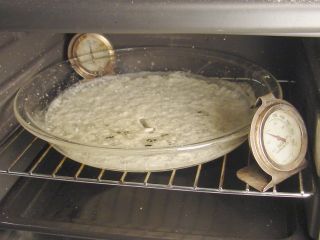 Note the two thermometers. My
oven runs about 20 degrees hotter in the back than in the front.
Note the two thermometers. My
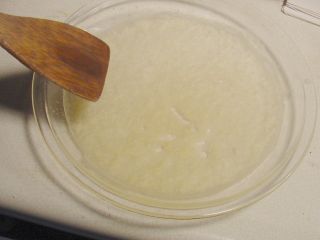
oven runs about 20 degrees hotter in the back than in the front.| After X minutes, a lot of bubbling and some drying
will have occurred. If one side starts to turn yellow or brown before
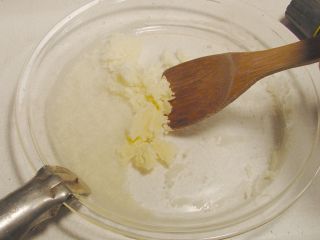
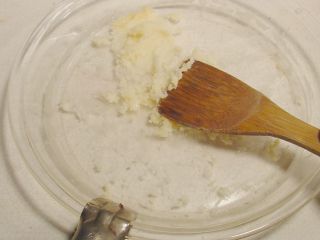
the other, turn the pan halfway around to even the cooking. At XX minutes, the whole surface will be white in color, and the "wet spots" will be gone. Reduce the oven temperature to 200 degrees. (Your own 200 degree mark, set by using the oven thermometer.) Cook the propellant another XX minutes at 200 degrees. This is about how long it will take to dry the propellant. Time to take a sample and do the "snap test" (see the Rcandy full recipe for photos) Snap Test: Take a tiny bit of propellant from the lighter side of the pan. Roll it into a pea* and press it down on a cool, dry surface. Give it 30 seconds to cool, and bend it in half. If it snaps cleanly, the propellant is done. If it bends a bit but is firm, that is OK too. But if it forms a mushy ball or makes a floppy flake, then throw the sample back and let the propellant cook some more. *If it won't roll into a pea, it is either too soft and turns to slime, or too dry where it turns to crumbs. If too wet, cook it some more. If too dry, remove immediately and process, adding more corn syrup if necessary. When the propellant passes the snap test, put on your protective equipment (at least a face shield) and take the pan out. Scrape up some of the flakes and press them down with the back of a tablespoon. Scrape them up, press them down. Do this until they consolidate into a cohesive mass with a clay-like or putty-like consistency. Hopefully that will happen easily. If they refuse to consolidate, reheat to 200 degrees and try again. If the flakes still refuse then the batch may be too dry. Try adding 1/4 tsp. corn syrup, heating to 200 degrees and consolidating it again. |
Hey!
What's all this "XX" time stuff? It's my way to make sure you know that
any numbers I give are going to be wrong. Your oven will cook differently
from mine. You will be at a different elevation, at a different humidity,
using different brands of ingredients....
It is much better to observe, look for cues, and develop your own time frame. Even then, you will find that the cooking times vary. I have had batches that were overdone in 20 minutes, others that took over an hour. They average about 45 minutes but remember these are ballpark figures. My mileage varies and so will yours. Cook until done. That said, I can tell you that my oven takes about 10 minutes to cook this small batch dry, but that varies from batch to batch. There is no substitute for experience here! |
|
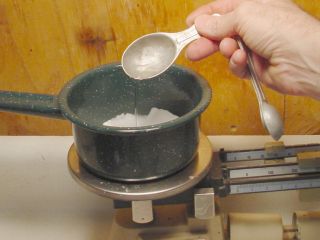
After the first mixing and partial cooling to 200 degrees, this propellant often assumes a "grainy" texture, somewhat stiff and crumbly, sort of like a praline. All it needs it to be stirred again. Knead with the spoon and the pleasant putty-like texture returns. After this second stirring, the grainy texture does not usually recur. |
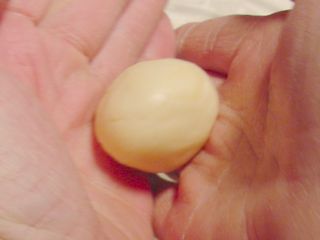
Test 2: burn rate I take out a little glob, about 1/4 teaspoon, and return the pan to the oven, now set at 200 degrees. Let the glob cool briefly. Touch it lightly to see if it is sticky. If so, let it sit another 15 seconds or so. When it is cool enough to handle without sticking to your fingers, roll it into a little rod one inch long. It should be roughly 1/4 inch in diameter, but that is not critical. |
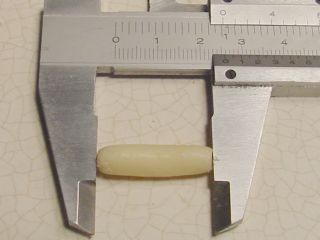
|
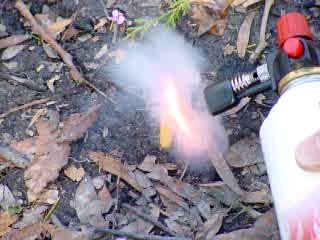
| Test for burn rate by igniting your test strand
and timing the burn. Lighter colored batches will burn continuously
from one end to the other. The batch illustrated on this pae burned
at 8 seconds per inch, which is about as fast as it gets with uncatalyzed
propellant. If the propellant is overcooked and turns dark, it may not burn continuously from one end to the other. I cal this "not continuous. " I rate non-continuous batches two ways: 1. If the propellant burns for a second or two or three and then goes out, I call it "Not quite continuous." 2. If it goes out the instant the heat source is removed, I call it "Not at all continuous." |
|