
Rocket engines made from trash
Foundry
Micro
Mini
Midi
Dimples
Flight Test
How To...
Home
| Midi
|
Cast-Nozzle III
Rocket engines made from trash |
Foundry |
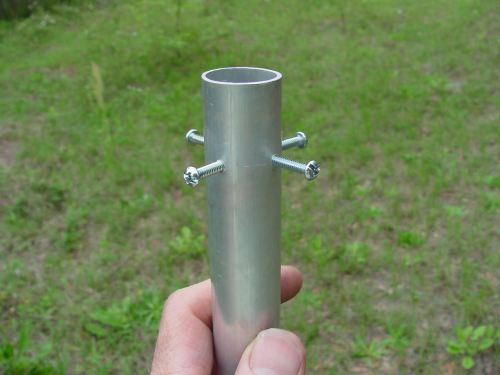
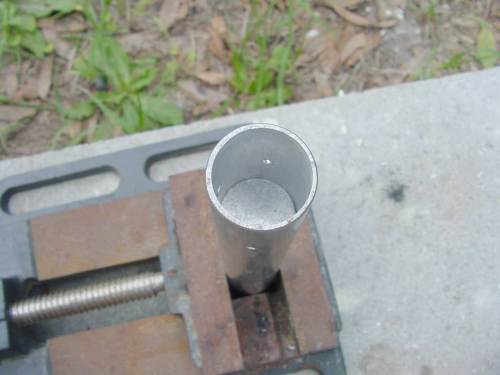
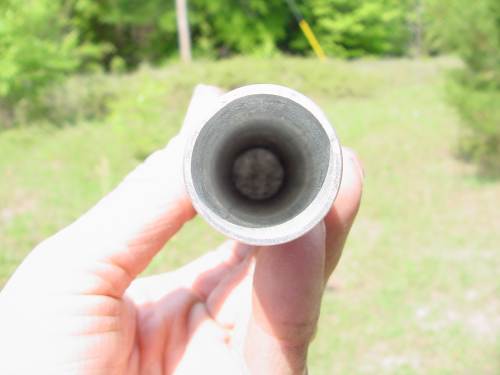
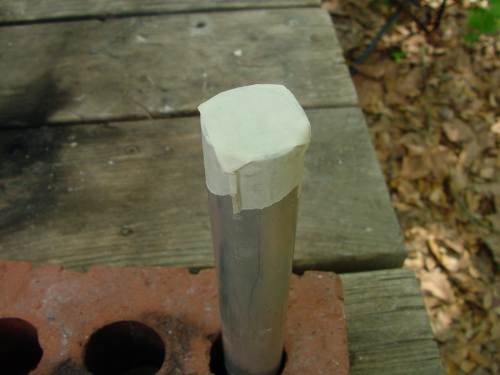
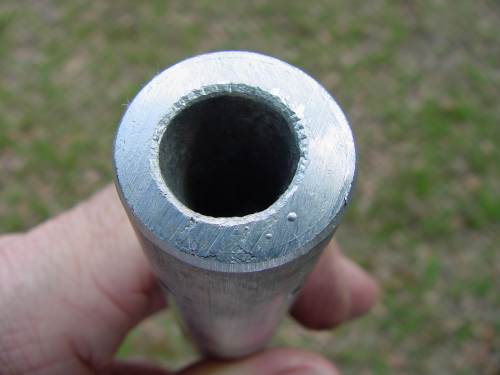
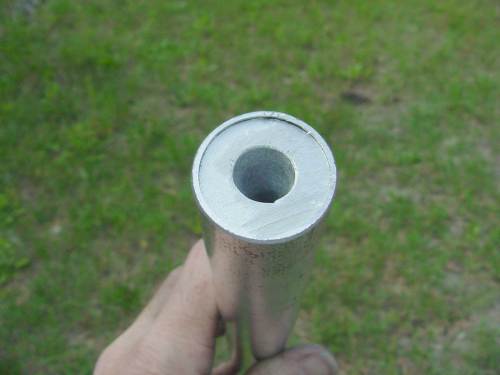
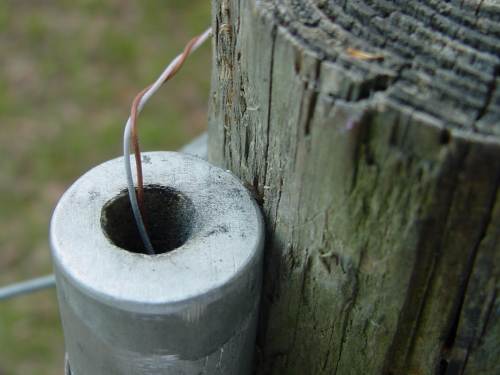
Engine Casing, "1 inch" and "1-1/4 inch" tubes
I was delighted to find a hardware store in town that has real stuff. They carry aluminum tubing up to 1-1/4 inch OD. So now I can indulge myself by making larger aluminum cases, approaching the size of my recent PVC engines.
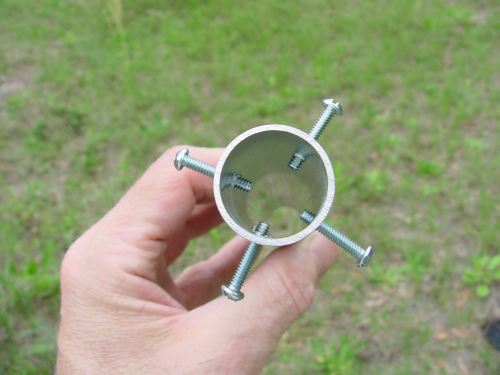
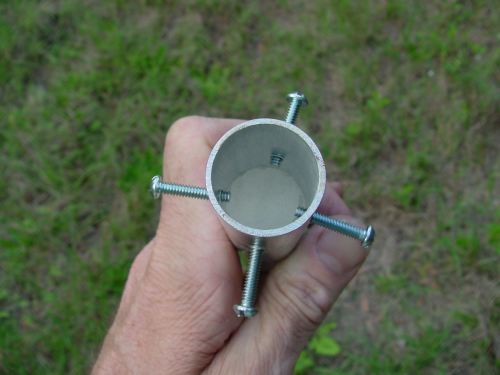
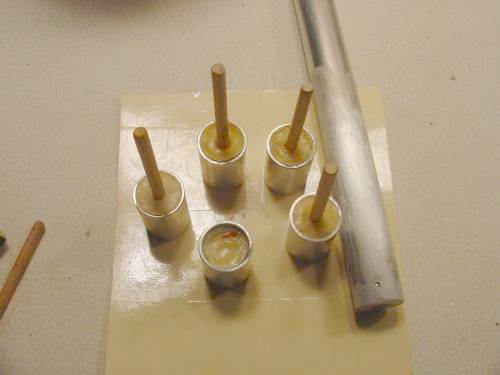
Here is that really bright idea I mentioned earlier. Instead of just drilling holes to let the aluminum drip through, I drill holes, tap them, and insert small screws. These will intrude into the aluminum nozzle and prevent its rearward movement. The threads are rather tight, thus I believe they might not leak. I intend to cut off the heads and grind the screws flush, making a clean case.
Well, that was a comedy act. Sorry that I didn't get it on video. The nozzle-cone former stuck so nicely in the molten aluminum that I could not get it out. I twisted it, tapped it, hammered it, pounded it, and said rude things to it. To no avail. Finally I cut the nozzle-end off and melted the aluminum. Got the screws back, and my pointy thing, well annealed.
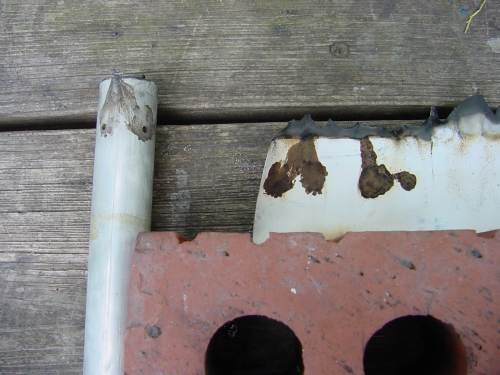
The good news: Now that I have started ruining store-bought tubing, there is no shortage of castable aluminum. The roadside cans are safe for awhile.
I do have a shortage of unburned steel cans, and have even taken to drinking healthy beverages to alleviate this problem.
Static Test 4/5/02a
Click on photo to download a short video of this test
(1.5 meg file for 8 seconds of video)
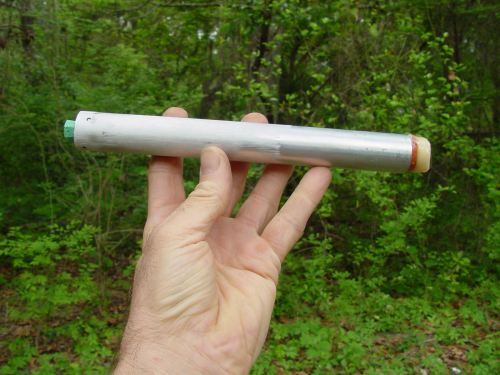
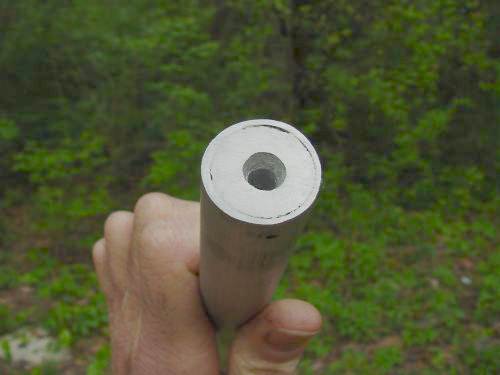
Case: "one inch" aluminum tubing, 7-5/8 inches long, lower 2 inches
consist of cast nozzle
Nozzle throat: 0.25 inch
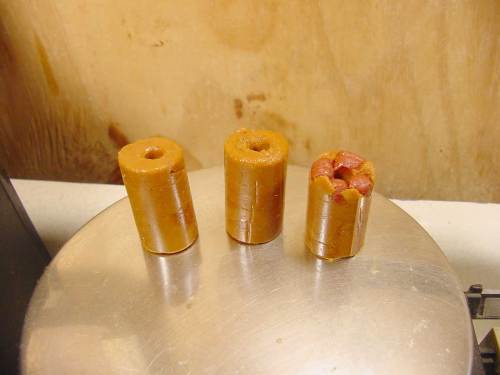
Fuel: two uninhibited grains recrystallized KN/sucrose, each
1.5 inches long by 0.9 inch diameter, core: 0.25 inch
Total fuel weight: 47 grams
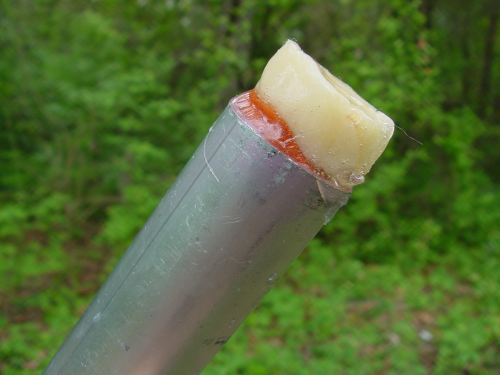
Header of catalyzed rcandy, 1.25 inches long, extending from tube about
1/2 inch. (so in effect, 3/4 inches)
Initial KN: 134
Final KN: 86
Burn time: 0.4 seconds
Ejection Delay: 5 seconds
Test 4/6/02B
1 inch tube, 1/4 inch nozzle throat
Fuel: slow rcandy, 3 uninhibited grains - OD 0.86, Core .25,
Len 1.4
Initial Kn: 363
Final Kn: would have been 236 but header blew out.
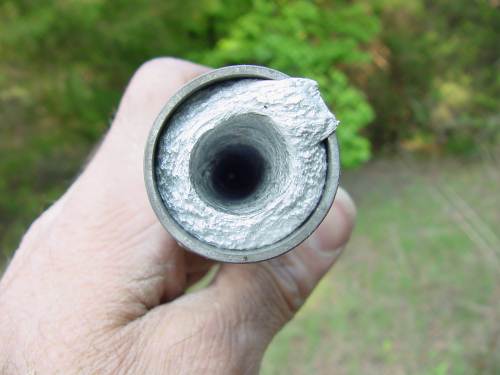
There is still quite a bit of leakage at the perimeter of the nozzle. I suspect that the gap is made larger by the bubbling and fuming of the molten aluminum when it is poured onto the dry-rammed Bentonite clay. Hey, wait a minute... if it's dry, why does it boil? I begin to suspect that there is some residual moisture in my clay. I could dry it out in the oven, but...
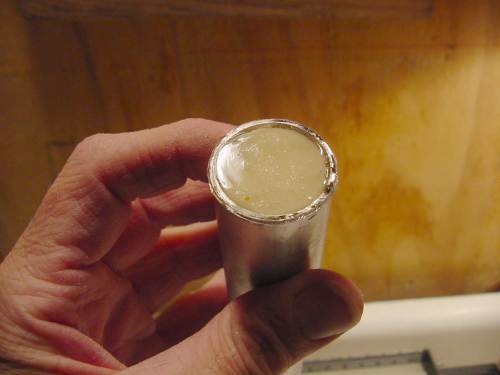
Won't aluminum foil work just as well? I roll up a ball of it,
push it into the tube, place it on a hard surface, insert a tight-fitting
dowel and pound it with a hammer. I tap it back up into the tube
about a nozzle-length. This makes a nice, tight-fitting plug with
no moisture. I wonder if it will melt. Try it anyway.
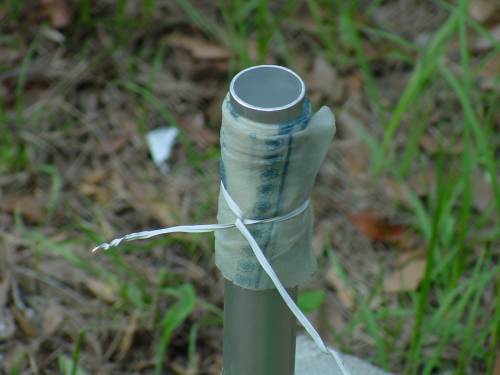
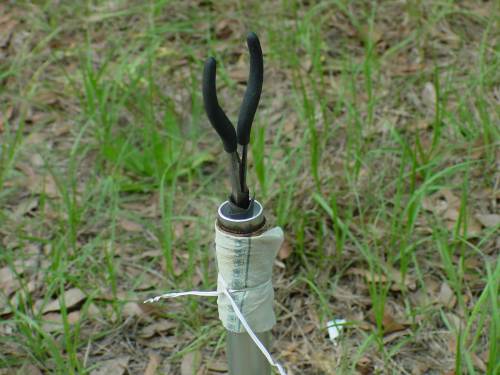
Also, the 1/2 inch diameter big-nail divergence-former is just too small for the new larger tubing, but I really don't want to spend all day grinding a railroad spike to a point. On a whim, I try twisting a strip of tin-can metal into a steep cone
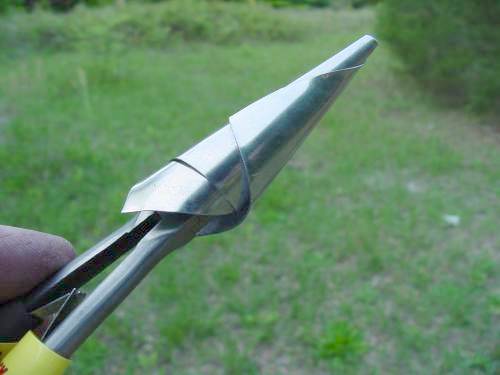

Responding to my whim, it formed a nice smooth cone, and sprang loose
with a gentle twist of the skinny pliers. And the foil plug held.
I'll have to whim more often. The nozzle is well off-center, so I
cut this one off and melted it down for another try.
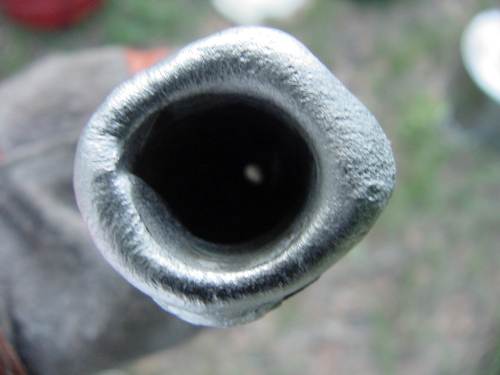
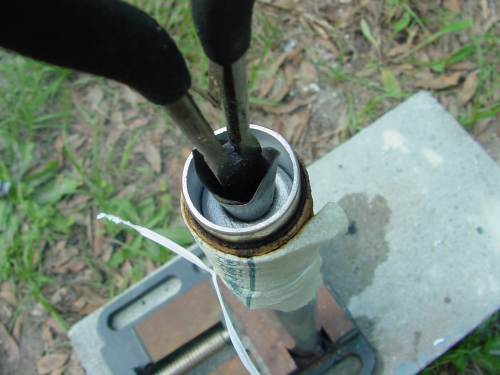
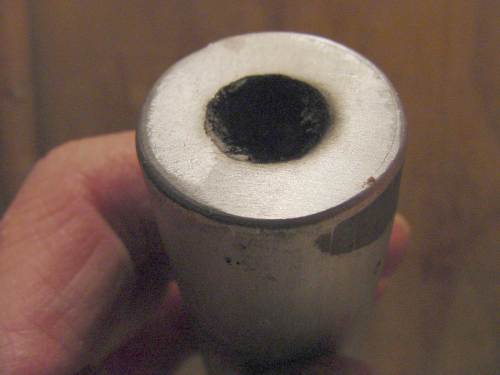
The divergence cone is black now, but still in good shape. I ram it a little more carefully, and get it nearly centered. In drilling the throat, the aluminum foil plug fell out! Apparently it does not melt much.
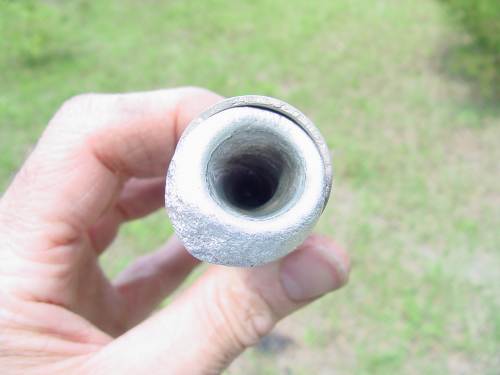

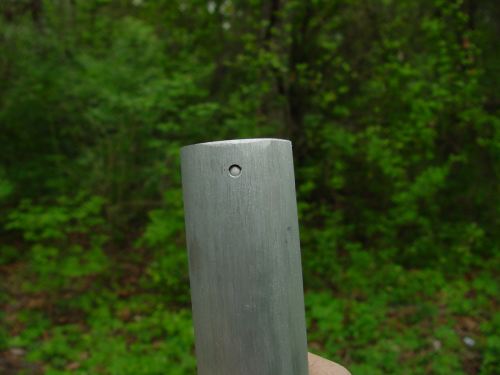
Still not exactly centered, but this one is good enough for static testing.
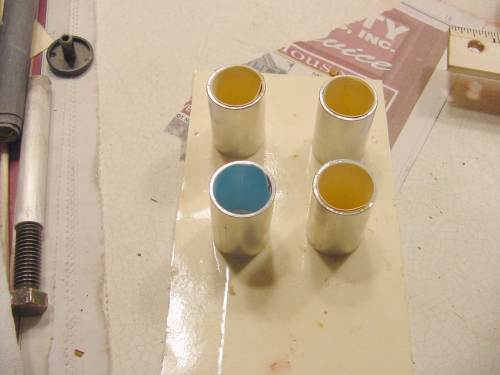
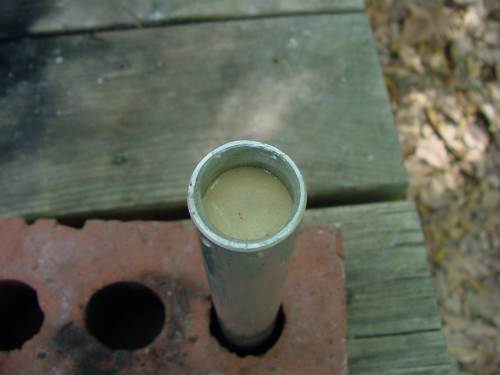
So, I will static-test it! Three Bates grains are prepared, plus a fourth solid grain to serve as a head-plug.
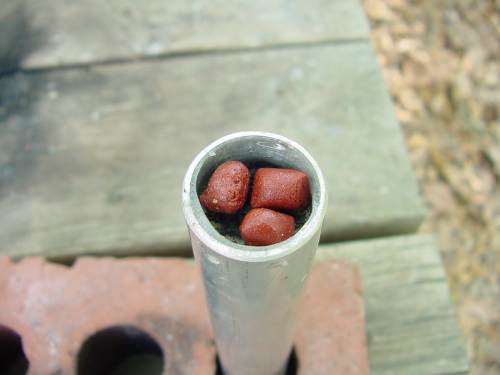
Note the red spot in the solid grain, lower-left. This will become
significant later on.
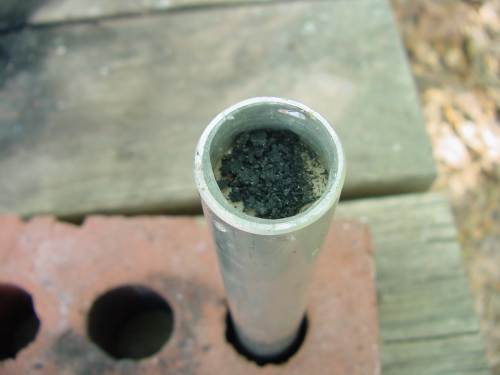
Since this is a slow-burning batch of "peanut-butter" colored rcandy,
I have embedded a few pieces of catalyzed candy at the head-end of the
top grain to help get the ignition going.
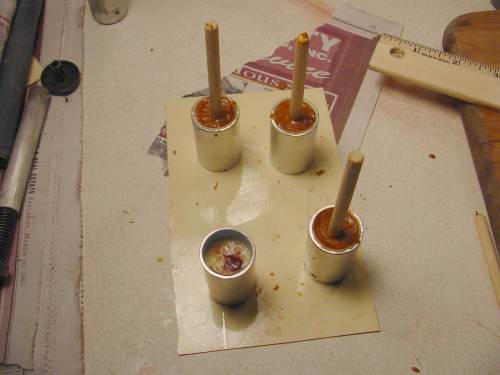
The plug is glued in with a generous helping of 90-second epoxy.
A little hole is drilled through the epoxy, a bit of black powder placed
on top of that, and three small pieces of propellant added to enhance the
"ejection" effect.
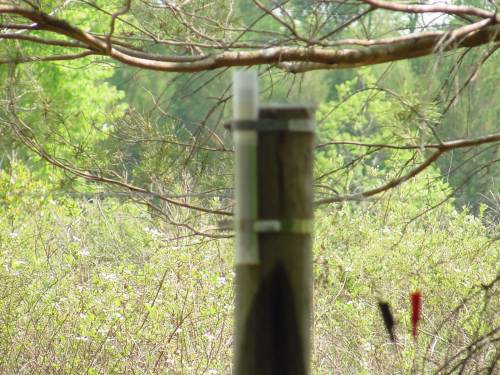
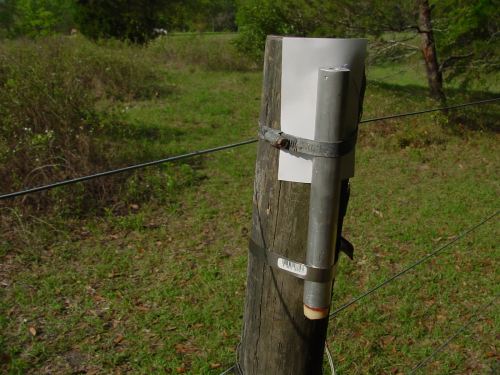
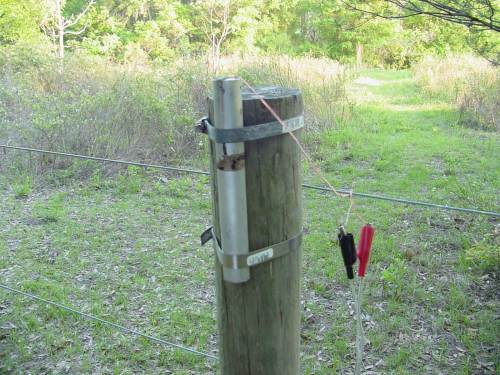
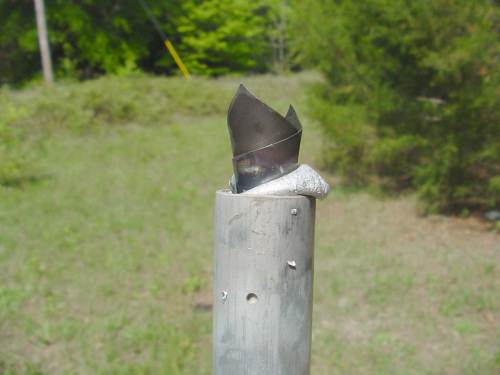
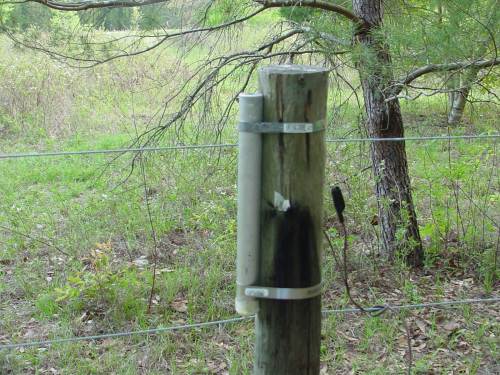
This is attached to a fence-post and fired with an electric ignitor
wrapped up with 1/3 gram black powder.
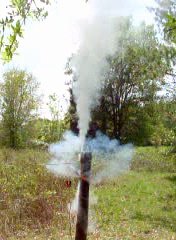
Static Test

Click here for a video of this static test
(Beware, 1.5 meg file, 10 seconds of video)
Nice burn, don't you think? Did you see the horse in the background as he become aware of this test? He bugged off pretty quickly. His name is Bugs.
And did you notice the long after-burn in the tube after the "ejection charge" was ejected? This was an experimental header, a plug of slow-burning rcandy about an inch long with a solid core of faster-burning red rcandy, catalyzed with Fe2O3 and burning about twice as fast. I was just curious. I can't think of a use for this after-burn at the moment, can you?
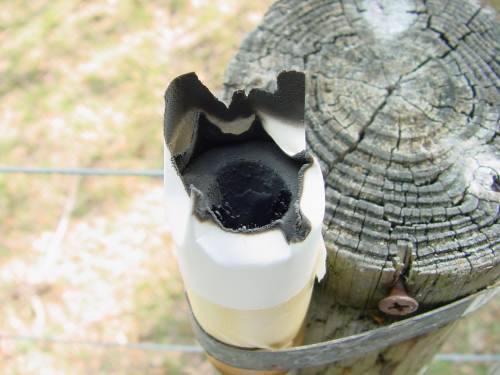
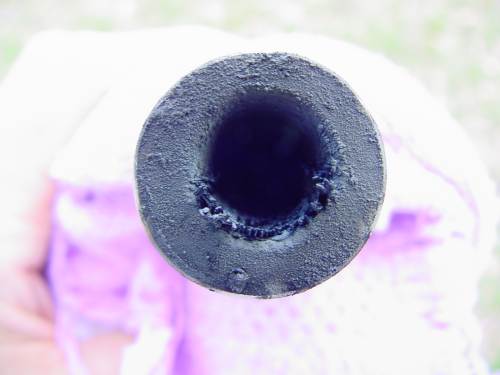
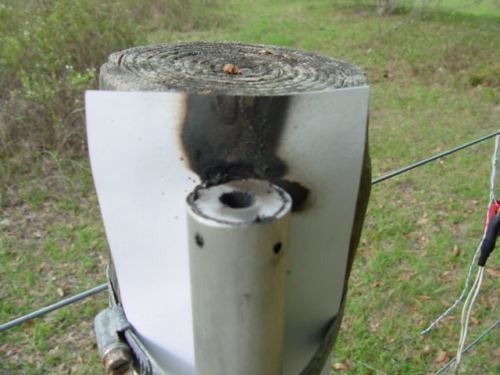
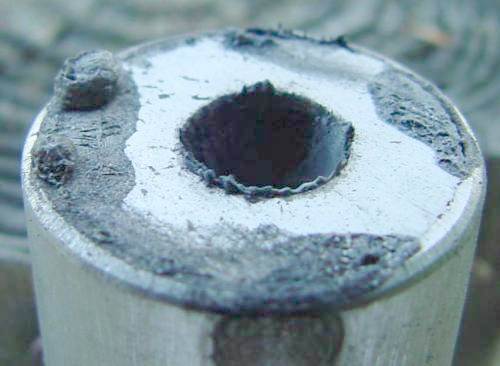
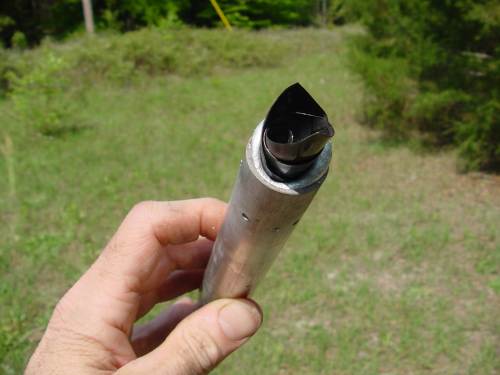
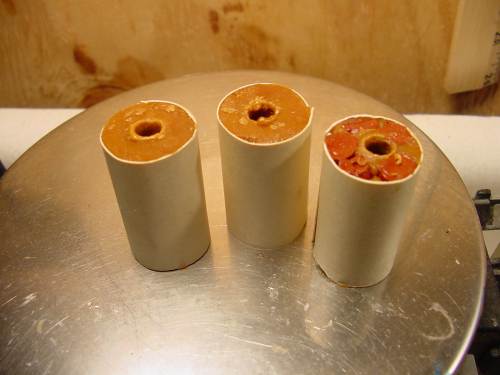
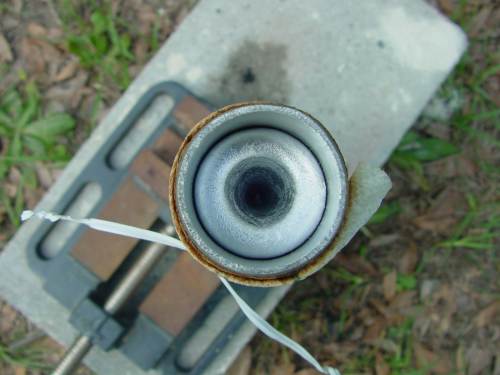
The paper wrapper and residue indicate some leakage through the holes
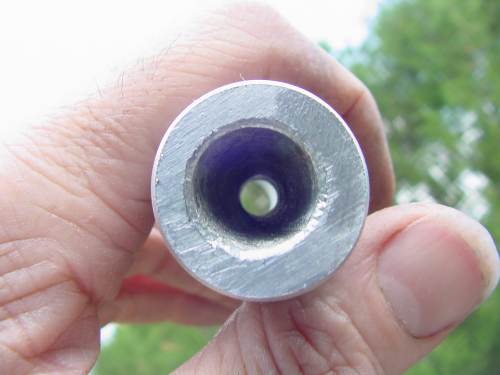
but no leakage is apparent around the perimeter of this nozzle.
Soaked in water and wiped clean, the nozzle shows a faint edge where
it might have broken free of the casing, but it has not moved much.
I have been heating the head-end to clear out residual epoxy.
Here I demonstrate that it can be overdone.
Note the revised method of moderating air supply into the charcoal
foundry. Just punch a hole in the can and aim the blower pipe at
it. Move it back or off to one side if you want less air. Only
one iron pipe is needed and the cans last much longer. Also, I am
now using charcoal briquettes, adding a little homemade charcoal when it
needs a boost. This way an olive-oil can may be fired many times
before it burns out.
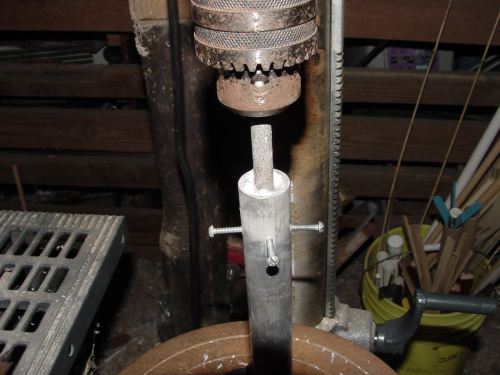
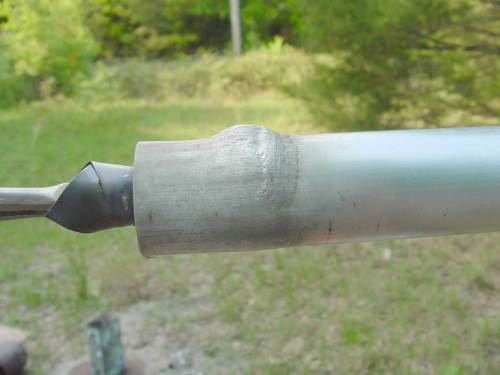
Second Engine, 1.2 inch tubing
Another try, same technique more or less.
I didn't bother to drill the holes as my intent is to cast the nozzle,
let it cool, drill small holes, tap them and insert screws.
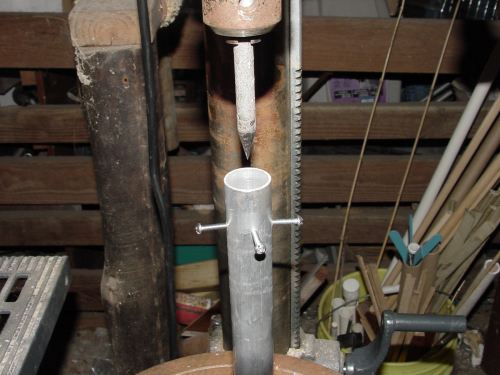
The plan is to fill this end with molten aluminum, and ram in the skinny
cone before it hardens.
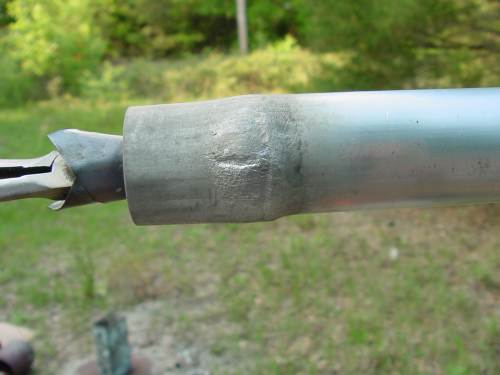
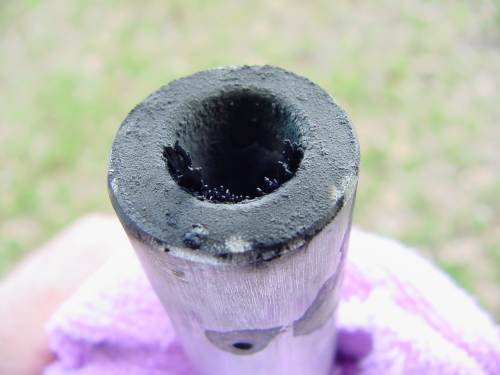
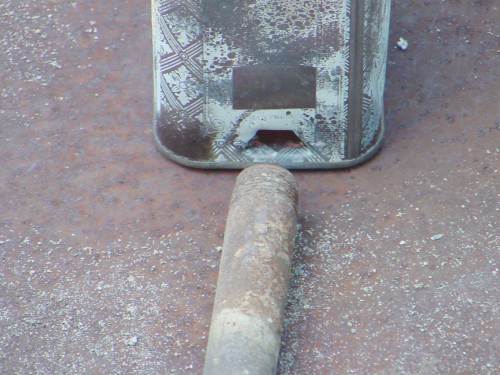
Well! This one got a bit too hot, would you say? I started to cut it all off and enhance my casting supply, but had second thoughts... The aluminum tube partially melted. The nozzle casting might be stuck in pretty well. At least it is invested in the bulge, and might be fused to the casing. The bulge can be ground off, eventually, and the nozzle is even farily well centered.
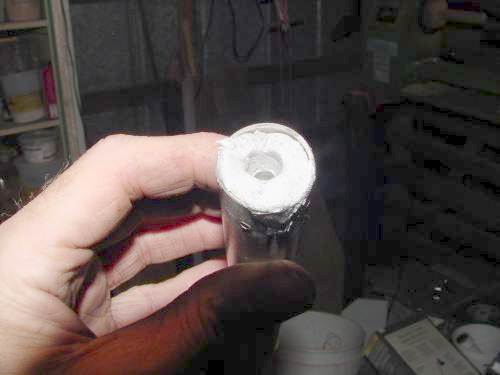
Third Engine, 1.2 inch tubing
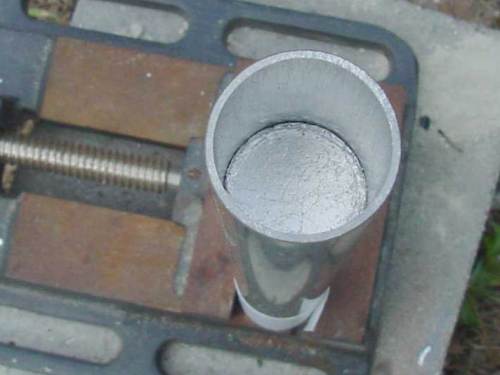
But I have some more molten AL and another tube cut so tried it again right away. This time I wrapped the tubing with a wet paper towel, hoping that the water would absorb enough heat to keep the tube from melting.
The wet towel worked well. Too well. The resulting nozzle
is loose, and can be moved back and forth in the tube with finger pressure.
In any event, this is the best-centered nozzle I have made.
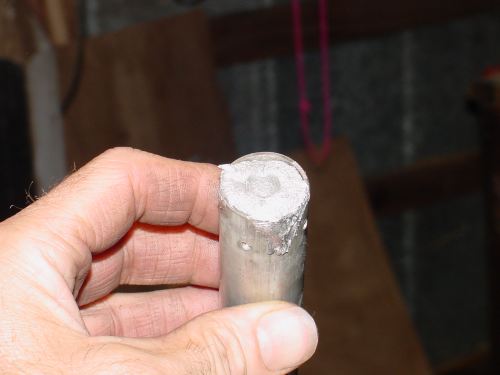
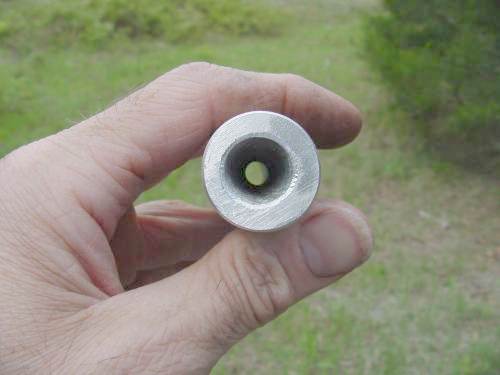
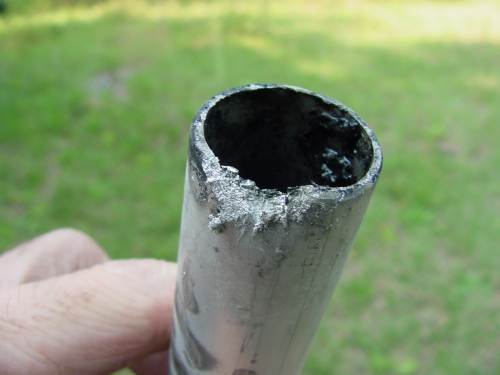
I wanted to see what the casting looks like and so tried to pound it out with a hammer and a sturdy dowel. It came out about 1/2 inch then stopped. I got a bigger hammer, and banged on it for all I was worth. No amount of pounding would drive it further. So I set it down to consider other methods of removing it, then thought - if it is stuck that well, then perhaps and engine firing would not blow it out either. And perhaps it has sealed itself in the tube so that no leakage would occur (there are no lateral holes) For insurance, I drilled a couple of holes above the throat where the aluminum is thickest, tapped them, and drove in some small screws. So maybe this one will work well too. I have yet to test-fire it. I like to admire that well-centered cone.
Back to Tube 2
The lopsided tube, the one where the case partially melted, was tested
once with a moderate-sized uninhibited grain. It held OK, so I stuffed
it with Bates grains for a second static test.

Static Test 4/7/02A

Click Here for a video of this test
(1.4 meg file, 10 seconds of video)
A blown header. The fire ants at the base of this fencepost were rather annoyed. You'd think fire ants would enjoy this kind of entertainment. I believe the blow-out was due to a marginal glue job on the solid grain which served as a head-plug. Next time I will clean that part of the case down to new metal. But the case itself is declared a success. It held the pressure OK, the nozzle did not move, there was no leakage around the perimeter, and it is still 5/16 inch throat diameter. This one can be used again.
And I will endeavor to replicate the partial-melt casting, which is
promising.
Jimmy Yawn
6/11/02
jyawn@sfcc.net
Recrystallized
Rocketry