Snap Dragon
Scratch-Built Model Rocket
Part 5: Body Tube Covers
Scratch-Built Model Rocket
Part 5: Body Tube Covers
|
Snap Dragon
Scratch-Built Model Rocket Part 5: Body Tube Covers |
|
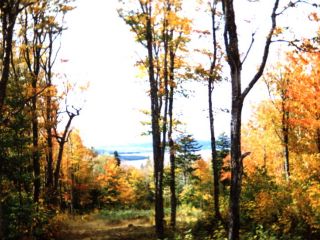 |
But the scenery was so good that even the mediocre shots were
appealing, and on top of that, I accidentally got a few good.
Scanned the
best ones, and used one of them for my desktop wallpaper at
work. Someone installed a color laser printer and made the mistake of giving me access. I had to test it to see how well it would do photos, and hey! How about this Maine picture? Nice shot of some tall trees, lake, and mountains in the background. I left it laying around, as is my habit. A few months later, I was scheduled to give a presentation at conference on psychological type in education (www.capt.org) and wanted to get folks to laugh. I am willing to resort to the cheapest of tricks to get an audience on my side. |
 |
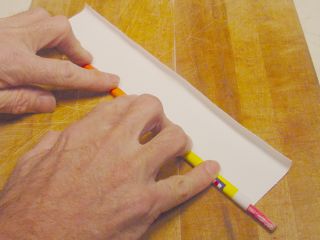
It worked very nicely! The fins went on straight, thanks to the
angle-aluminum guide. They were evenly spaced thanks to the longitudinal lines, and fore/aft placement good enough that it would stand up on its own, thanks to the end-mark. |
 |
So I went kinda wild. And soon realized that it is really easy to do a bad job of this. Here are a few examples: |
 |
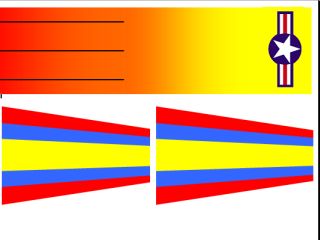 Click Here to open the Word version of this graphic |
But if I am going to use dollar-a-sheet paper, I want a better
design. So I went online and found Kurt Schachner's collection of decal designs
for historic Estes and Centuri models, from which this star-n-bar
insignia was obtained. I used Word to make the gradient and the fin covers. Yeah, why not cover the fins too, save a lot of sanding, painting, etc. Besides, the paper serves to reinforce the wood, so I can use 3/32 inch balsa and it might not break right away. Here is a Word doc with 3 fin covers on it. Guess I should work up a design that gets 3 fins plus tube cover on one sheet. I have a variation in yellow and blue. And another one with a Boy Scouts motif |
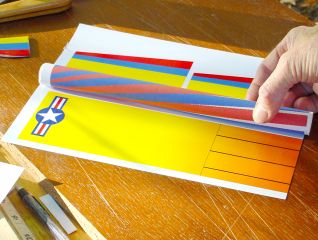 |
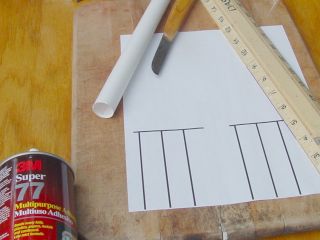
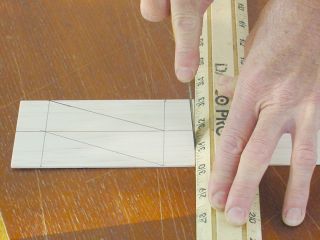
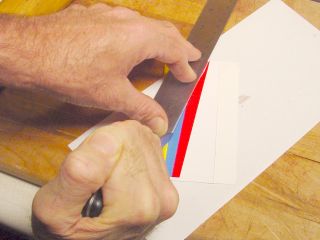
The wrap should be about 3 inches wide. The body tubes
average about 0.9 inches, so the circumference would be 2.82 inches.
Divide that by 3 and you get 0.94 inches between fins.
Since the paper thickness will add a bit, I am using a fin
spacing of 1 inch here, and it is about right. Fine tuning may be
helpful, but this is good enough for a start. Here I am sizing up an ugly tube to see if it can be recovered. Decided against it, thinking the extra coating of paper might make the new alignment lines incorrect. I made a new tube instead. |
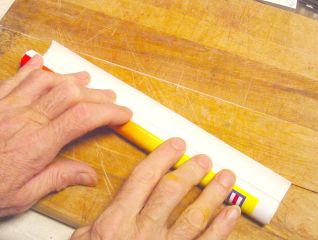 |
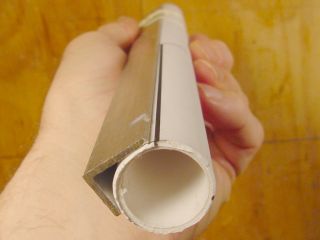
Sprayed the wrap with Super 77 and rolled it on. This is easy! But I forgot something.... |
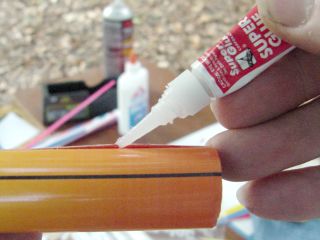 |
There were a couple of gaps in the final edge. I had
failed to pre-roll the edge. That was not necessary with the
plain paper, but this photo paper is much thicker and stiffer. Elmer's didn't work, it just yawned wide open again. So I tried a little super-glue and guess what! It works really well. |
 |
Note that I'm holding the edge down with a thick plastic bag. Getting CA'd to something is funny when it happens to someone else.... Super glue doesn't seem to stick to polyethylene baggies at all. |
 |
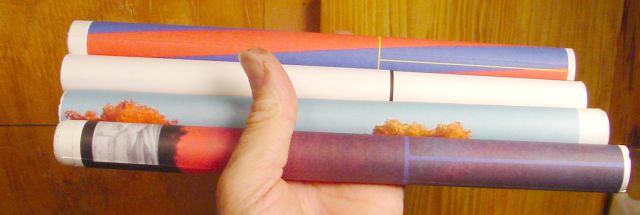
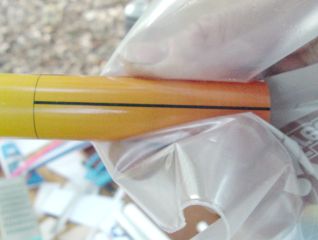
So here is another wrapper. I'm doing the pre-roll thing this time. Glued it on, and it works great. No loose edges. |
 |
 |
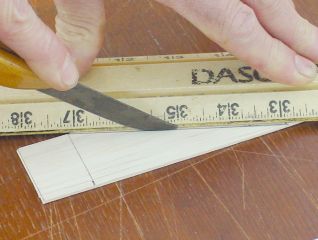
Here I'm cutting fins from 3/32 inch thick balsa. The strip
is 3 inches wide, so I split it in half. Thus each 6-inch section makes 4 fins. The leading and trailing edges of these fins will be rounded or tapered with sandpaper, as illustrated on the Fins page. |
 |
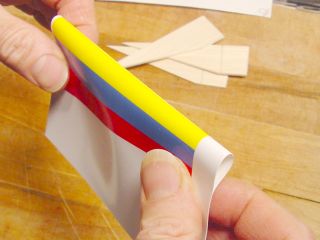 |
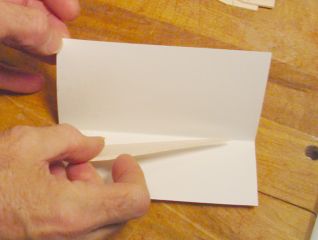
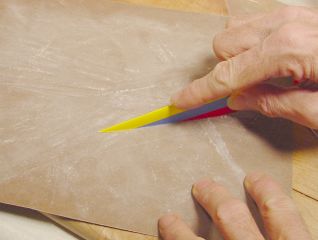
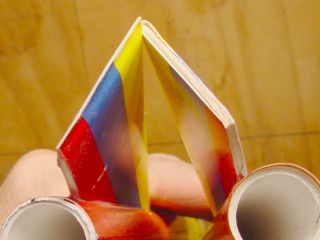
A colorful trapezoid is cut out, with a lot of extra paper around the
edges. It is folded directly down the middle so that the colored
stripes are symmetrical and even on both sides. This is a test-fitting to make sure it goes in OK. It does. |
 |
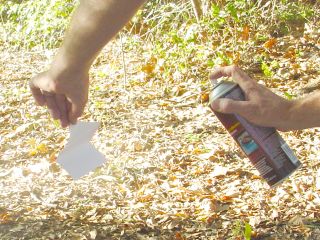 |
Good way to get stickyfingers. But when I set the paper
down, the spray blows it over! Guess I could use a clothespin or something. If you want the bond to be extra strong, spray the balsa with glue too. Fin is inserted into glued paper... |
 |
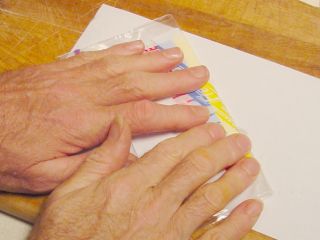 |
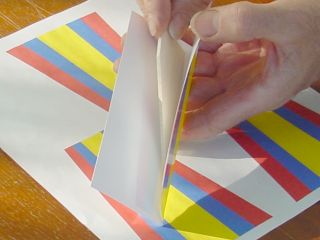
...folded
in a Ziploc bag, and pressed firmly. The bag keeps my sticky
fingers from adhering to the paper. Don't want to leave any
fingerprints, do we? This procedure creates a fin packet, a colorful fold of heavy, glossy, pretty paper with a balsa fin somewhere inside it. |
 |
 |
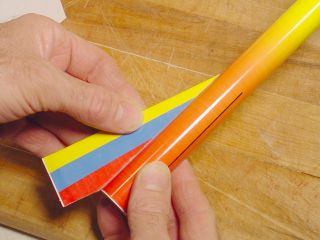
By pressing at the edges
with a fingernail, I find where the balsa begins and lay a
non-skid ruler along that line. Sharp knife is used to cut away
the excess paper. I notice that it is so easy to cut through the balsa like this that I don't even notice when it happens. Ruined a fin that way, but it suggests another technique, to glue paper to balsa, then cut it out. |
 |
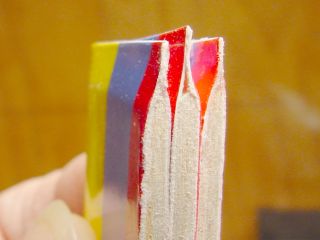
Root edge of each fin is sanded to remove excess paper and
make the edge flat and true again. The remaining paper flares out
a little. I leave this frilly edge on believing that the tiny tendrils will make for a better glue joint. |
 |
The aluminum bracket is rubber-banded to the body tube and aligned with
one of the fin index markers. A dollop of Elmer's is spread along
the root edge, and the fin pressed into place. After about 30
seconds, the aluminum guide is moved to one side so that the fin does
not get stuck to it. The fin is allowed to dry for a few minutes
before adding the next. |
 |
 |
Here is a bonus. I hadn't planned on this and so did not do it
very
well. Instead of trimming the paper right up to the balsa, I left 1/4 inch or so and presed the edges together. It made a nicely feathered trailing edge. I'll try to do it better next time. |
 |
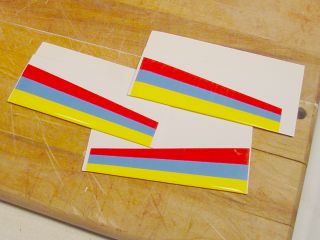
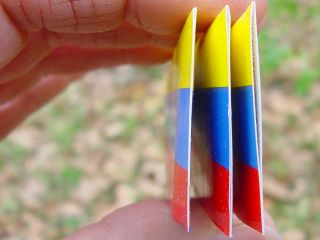
But compared to the first of these I made with a very square end, the paper
taper is grand. The edges can be trimmed with scissors so they are all even. |
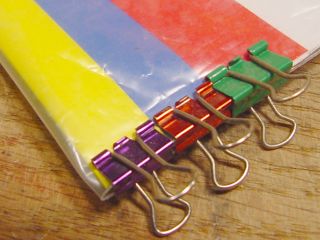 |
Here is that better job I promised. Note that the fin itself is inside a covering of heavy polyethylene (a Ziploc freezer bag) to protect the finish. |
 |
It worked! The two on the left
were done with the clamps, the one on the right wasn't. It
can be fixed with a touch of super glue, but I prefer to do a good
job
to start with. I like clamps. Clamps are good. |
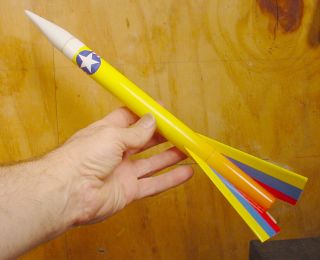 |
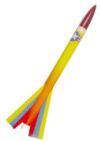
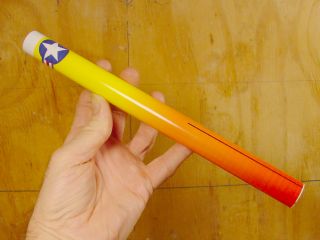
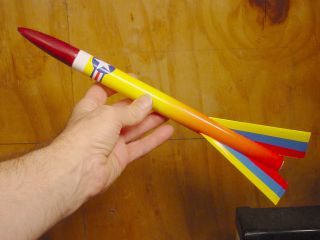
The left model uses the paper nose cone illustrated on that page. It looks kinda awkward. It needs a paint job. The red nose cone is one I turned on a wood lathe. |
 |
|
This printed photo paper stays kind of "sticky" for a long time. So
after drying, I give it a couple of coats of clear "top coat" lacquer.
This makes it much less sticky and more water resistant. I understand that there are special fixative sprays for inkjet photo-paper. Perhaps I should get some. But this Plasticoat lacquer works petty well. |
 |
Jimmy Yawn jyawn@sfcc.net Recrystallized Rocketry rev. 12/18/05 |
 |