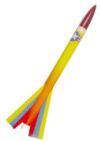
Snap Dragon
Scratch-Built Model Rocket
Part 3: Nose Cone
Scratch-Built Model Rocket
Part 3: Nose Cone
|
Snap Dragon
Scratch-Built Model Rocket Part 3: Nose Cone |
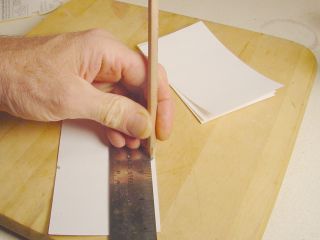 |
I start by making a mark in the middle of one long edge of a
3x5 index card. This is where the apex of the cone will be, and the
mark reminds me of its location. To get the angle right, I make a mark on the other edge 1 inch from the side, and draw a line between the two. |
 |
Sometimes words don't do justice, so here is a drawing. When I work with a group of kids building these, I have them mark the card as shown. It's a good opening exercise. It gets the kids into the swing of following instructions, and lets me see which of them may need extra attention. Then I can check the cards and see if a kid has "got it" before moving on. It lets me observe if they know how to measure with a ruler. If not, I rag them until they do. It's a gateway skill. Do draw the guide line - it helps roll the cone accurately. Don't feel compelled to draw the rest if you have "got it." |
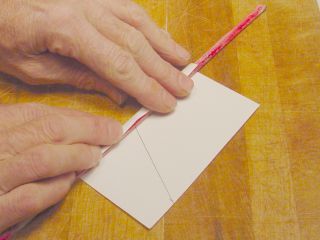 |
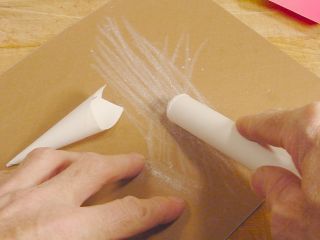
The far edge is pre-rolled on the 1/4 inch diameter
dowel. This gives it a bias toward curving, both on the inside
and the outside flaps. This will
help make a smooth roll once the glue is applied. Inside curl will help to keep the cone round, as a straight flap will tend to distort the tube into an ovalish cross-section. Outside curl will help that flap lay flat upon gluing, rather than (un)curl up. |
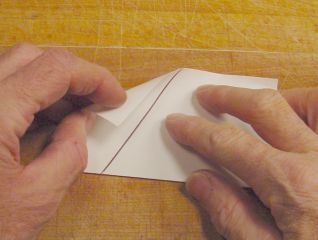 |
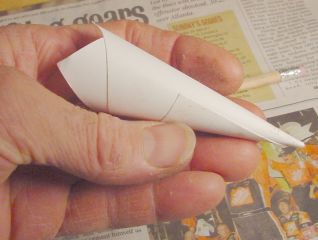
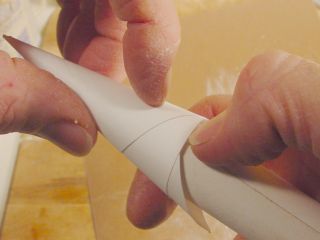
Top-left side is bent down to make a partial fold as shown. This is the start of the cone. |
 |
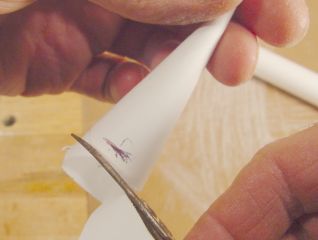
The cone is pre-rolled to something close to its final form.
What's wrong with this picture? It was taken before I pre-rolled the edge. Note that the final flap wants to fly. It must be convinced to lay flat, that's why the pre-rolling is done. |
 |
Having done my pre-rolling duties, I may proceed. Another card is used to mask the first section of the nose cone card. Masking is not absolutely necessary, one could just spray the whole card. I did that on the first few, but Super 77 is sticky stuff, and rather annoying to have on one's fingers. Makes it hard to let things go. |
 |
The cone is rolled again, this time with the glue. Since the final flap has been pre-rolled, it lays flat of its own accord. Be sure to check the inside and make sure the inner flap is pressed firmly against the inside of the cone. |
 |
The cone will be mated to a body tube. To give it
a better gluing surface, I sand the end of the tube at an angle which
will match the taper of the nose cone, more or less. (Hey! a thought.... cut the body tube edge at an angle so that it rolls "stair steps up the ziggurat" with an angle that matches the cone... I haven't yet tried this, but will!) |
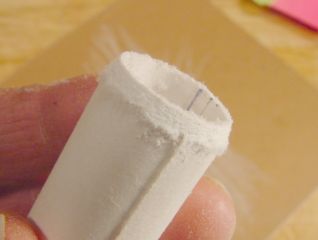 |
Here is that taper I mentioned. It should provide
a larger gluing surface, mating with the paper cone better than the
original sharp shoulder would, right? Posterboard does not sand cleanly, but that's OK. The fuzzy stuff is of no consequence, it will be removed later. |
Remember that idea of cutting the posterboard at an angle? Well I did it, and here is the ziggurat. 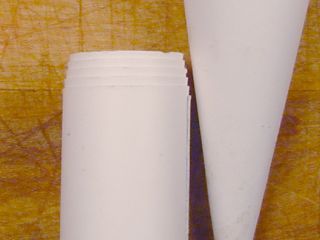 |
After sanding one to the point that it fit "right," I measured the depth of angled the edge and found it to be 1/4 inch. The board is cut so that one end is 1/4 inch wider than the other. It is 11-1/8th inch wide on the starting end, 10-7/8ths inch wide on the far end. |
 Less sanding is needed, and the fit is better. I'll keep this idea! |
 |
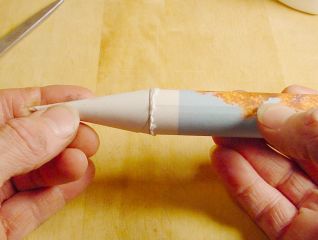
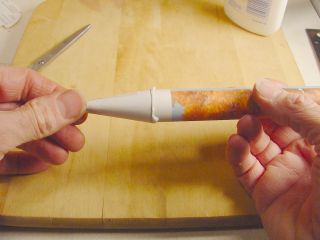
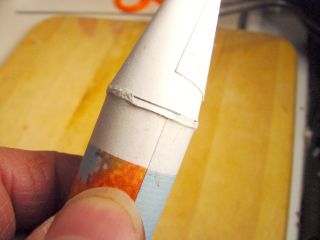
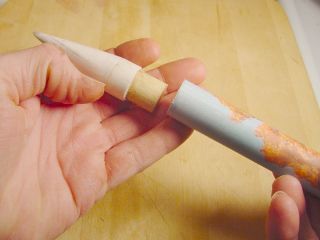
The dunce cap fits nicely on the tube, and stays put just from friction. Here I am marking the spot on the tube where this part of the cone comes.... |
 |
Marking the spot where the body tube will reach. I will trim the cone back just a little short of that mark. |
 |
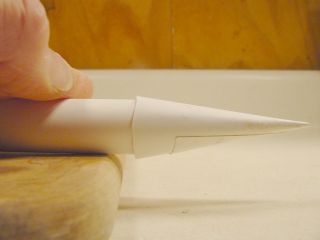
Cone is trimmed to within 1/4 inch of the mark. Better a little too long than too short. It's a lot easier to take more off than to add it back later. |
 |
A generous glob of white glue is applied to the end of the body tube, and smeared evenly. OK, now don't get upset that we have changed body tubes here. This is show biz, and these photos were made during several different "shoots." My bad for not using a plain white tube every time, to save that much distraction and confusion. I'll tell you all about the the pretty tube later. |
 |
Moment of truth. The cone is pressed onto the tube. Is is straight? Must find out quickly! |
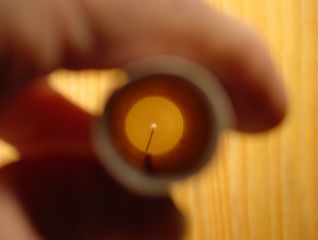 |
Apologies for the bad photo, but this shot is kinda hard to do.
Sighting down the length of the tube, I noted that the center of the point (bright dot) was not perfectly centered. So I adjusted it a bit. Get that dot exactly in the middle! |
 |
Second test for straightness: While the glue is still soft, I hold the body tube loosely in my right hand and spin the assembly from the cone tip. Notice if it wobbles, and how much. Adjust until there is no perceptible wobble, at which point the cone is straight. Whew! |
 |
Here is perhaps a better way to get the nose straight, and doesn't require quite the motor coordination of the previous method. Lay the tube on a flat surface with the nose cone overhanging the edge, get down there with it, and roll the tube. If the nose cone is not centered, the tip will appear to bob up and down. Nudge it a little towards the middle. Roll it until the tip points down as far as it will, and move it up a bit. Roll it again. Straighten it again. When the tip rolls in a straight line, leave it alone. Let it dry. Here is a video of me doing this one. (1.3 meg .mpg file, 15 seconds of video) |
 |
There is a bit of overlap, as planned. I must confess, I had already started sanding when it occurred to me to take this picture - note abrasion on the left side. |
 |
Here is an alternative to the pre-trimming. You can glue the whole cone on, big flange and all. Then take a very sharp knife, or a good serrated knife, and trim off the excess by slicing along the body tube. This is kinda crude, but it usually works OK. |
 |
The shoulder is sanded with 150 grit or finer sandpaper to remove what remains of the skirt and make it all even. |
 |
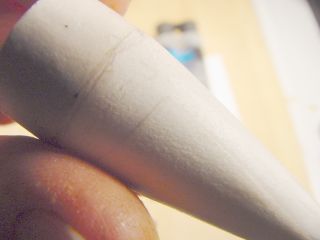
More or less even, if a bit rough. Note that the overlap has been sanded to reduce its obtrusion. |
 |
The magic of wet-or-dry paper. Here I am using 400 grit to smooth the cone and its shoulder. This will remove the frass and make the whole thing pretty darned smooth. |
 |
But it is still porous. So I smear a layer of Elmer's glue all over the cone. This will seal and harden the surface. Let that dry for 15 minutes, and smear on another coat. That will make it smooth, glossy and much stronger. But not strong enough. It needs the third glue! We will get to that shortly. |
 |
Now the nose cone is stuck firmly onto the end of the body
tube. This might be OK for a pyrotechnic rocket that goes up and
blows up, but that's not what this is about. Proper recovery is
required, and that means the nose cone must come off to eject a
parachute or streamer. So we will separate the cone from most of
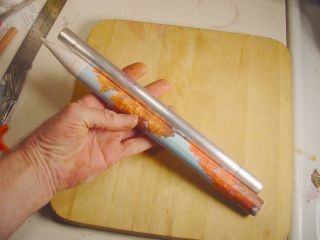
the tube. Remember the silvery dowel? It's the one used to roll the body tubes. I will use it here to assist in cutting off the nose cone. |
 |
The dowel is inserted into the body tube until it reaches the nose cone. This will support the far end of the body tube while it is being cut. |
 |
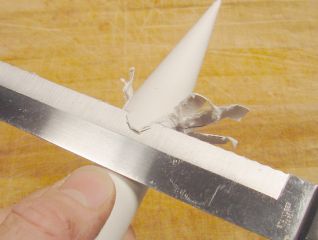
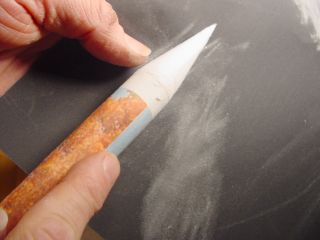
A long, sharp knife is laid on the body tube about 1/2 inch
from the base of the cone, and rolled carefully back and forth to make
a groove. Once a groove is established, more pressure can be
applied as the knife is rolled, eventually cutting through the body
tube. Click Here for a movie of me doing this with another tube (1.3 meg .mpg file, 15 seconds of uninspiring but perhaps informative video) |
 |
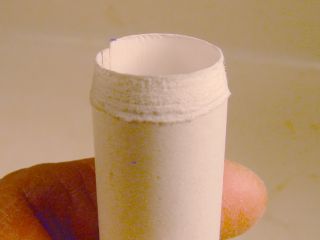
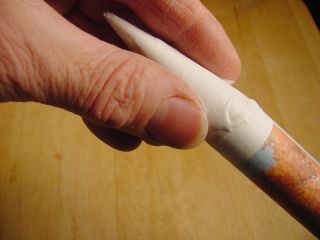
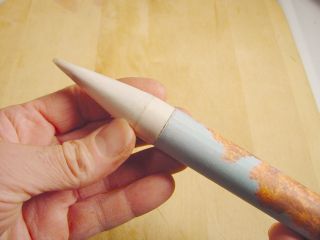
Finally, the nose cone is set free. Note that the overlapping paper has been sanded down and filled with glue-coats until it is barely visible. |
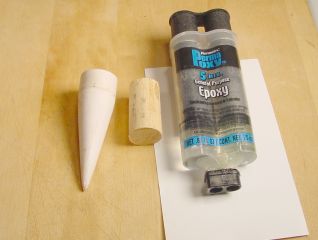 |
For now, it is just a thin, fragile paper cone.
Compromised in places by sanding, but still intact. We will
make it strong with the third glue, epoxy. A section of 3/4 inch dowel is cut to serve as a base. |
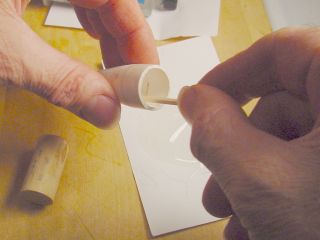 |
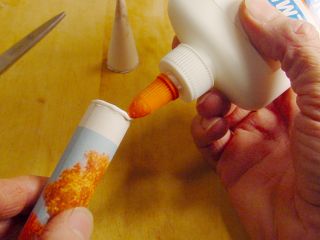
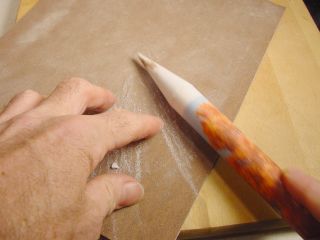
Some 5-minute epoxy is mixed up, perhaps a teaspoon. The entire interior of the paper cone is coated with this glue. I make sure that it coats the very tip of the cone to seal its small opening, and lingers in the shoulder where the short section of body tube meets the 3x5 card cone. Any glue left over is dumped in the cone and spread around the perimeter, preparing for the next step: |
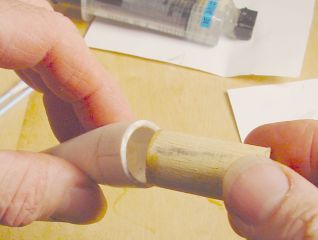 |
Dowel is inserted in the cone, with 3/4 inch protruding. The picture is deceiving - I coated the end of the dowel with epoxy before inserting it, to make sure it is glued really well. |
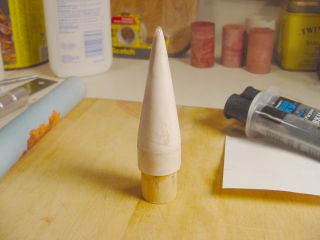 |
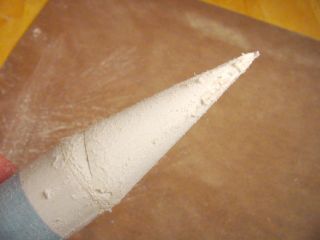
The nose cone assembly is stood upright on its base while the
epoxy cures. This is so it will drip down, reinforcing the
shoulder where the cone meets the tube and the paper is the thinnest. This may cause the glue at the tip to drain down, opening it up again. If that happens, give it another drop of epoxy after this first application has set. |
 |
The new nose cone assembly should fit the body tube nicely... that's where it came from! So even if the cut is uneven, or the tube is a bit out-of-round, you can rotate it back to the starting point, match the lines up, and everybody should be happy. |
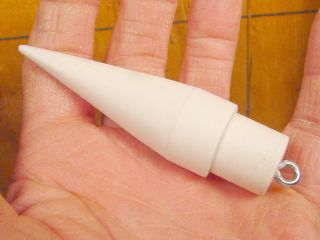 |
A screw-eye is added to give the shock cord something to hang onto. This is actually a different cone - note the paper base. It has a 1/2 inch wooden dowel for a core. |
 |
You can argue with the aesthetics. You can argue with the aerodynamics. But this is definitely a cost-effective procedure... once you have bought the three glues! |
 |
Jimmy Yawn jyawn@sfcc.net Recrystallized Rocketry rev. 12/12/05 |
 |